Netgear Router Access Point Setup For Outdoor Use
Extending your WiFi coverage outside can be a challenge, but with the right setup, you can enjoy reliable and fast internet throughout your front yard and backyard. In this article, we will explore the steps to setup a Netgear router as an access point for outdoor use, ensuring seamless connectivity and coverage.
Why Choose Netgear Router Access Point Setup?
Netgear offers a range of wireless routers and access points that are designed to provide fast and reliable internet connectivity. When you set up a Netgear router as an access point, you can extend your existing network and improve coverage in areas where your primary router's signal is weak.
Understanding Access Point Mode
Before we dive into the setup process, let's understand what access point mode is. Access point mode allows your router to function as a separate WiFi access point, providing internet connectivity to devices on a different network. This mode is useful for extending your network to outdoor spaces, such as your backyard or front yard.
Netgear Router Access Point Setup Steps
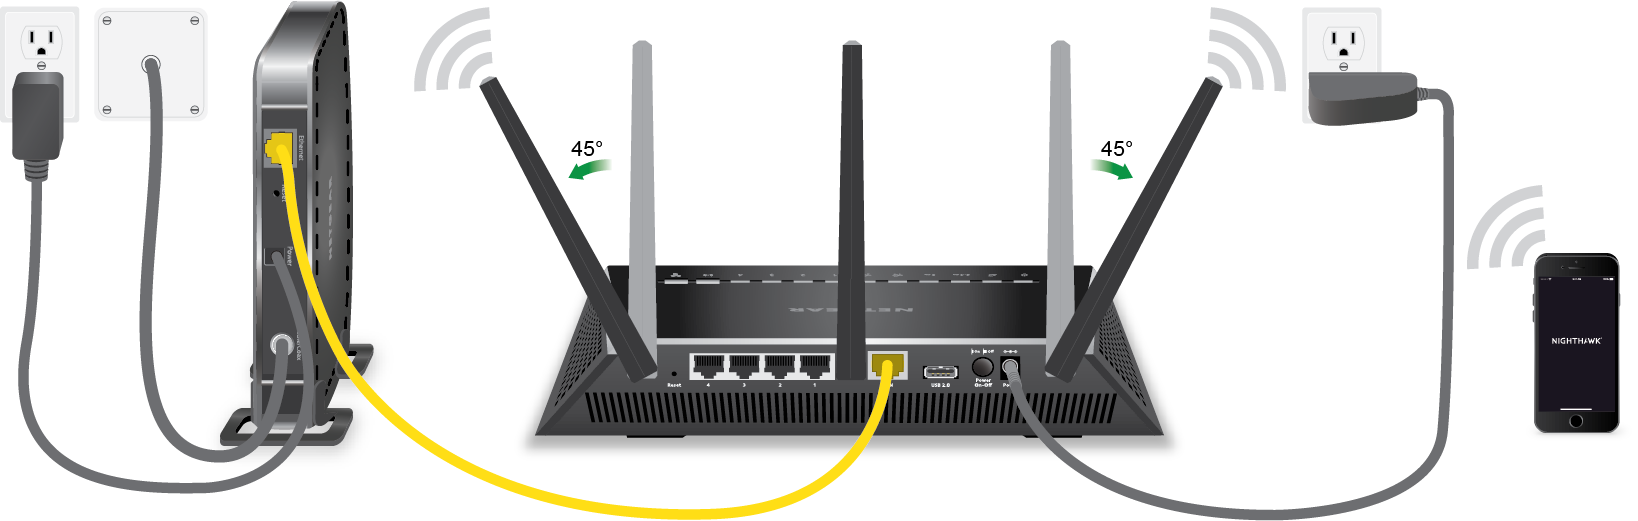
Step 1: Connect the Router to Your Network
To set up your Netgear router as an access point, you'll need to connect it to your main network using an Ethernet cable. Connect one end of the cable to the LAN port on your main router and the other end to the LAN port on your Netgear router. This will allow your Netgear router to communicate with your main router and extend your network.
Step 2: Change the Router's Operation Mode
Next, you'll need to change the operation mode of your Netgear router to access point mode. This can usually be done by accessing the router's web interface and navigating to the "Operation Mode" or "Network Mode" section. Select "Access Point Mode" to enable this feature.
Step 3: Configure the Wireless Network
Once you've changed the operation mode, you'll need to configure the wireless network settings on your Netgear router. This includes setting a name for your network (SSID) and a secure password to protect your network from unauthorized access.
Step 4: Connect Devices to the Access Point
With your Netgear router set up as an access point, you can now connect devices to the extended network. Make sure to connect your devices to the correct network (SSID) and enter the password to access the internet.
Tips and Considerations
When setting up your Netgear router as an access point, keep in mind the following tips and considerations:
- Place the access point in a central location to ensure optimal coverage.
- Use a high-gain antenna to improve signal strength and range.
- Configure Quality of Service (QoS) settings to prioritize traffic and ensure smooth performance.
- Regularly update your router's firmware to ensure the latest security patches and features.
Conclusion
Setting up a Netgear router as an access point for outdoor use is a straightforward process that can help extend your wireless network and improve coverage. By following the steps outlined in this article, you can enjoy reliable and fast internet connectivity throughout your outdoor spaces.
Additional Resources
For more information on Netgear router access point setup and configuration, refer to the user manual or contact Netgear support. Additionally, you can visit the Netgear website for the latest firmware updates and configuration guides.


")
 - WiFi 6 Dual-Band ...")


