How to Optimize Your Network-Attached Storage with a Wireless G Network Setup
Network-Attached Storage (NAS) is a fantastic solution for storing and sharing files across various devices in your network. However, setting up a wireless G network for your NAS can be a bit tricky if you don't know the right steps. In this comprehensive guide, we'll walk you through the process of setting up a wireless G network for your NAS, ensuring seamless file sharing and data backup.
Understanding Your NAS and Wireless G Network
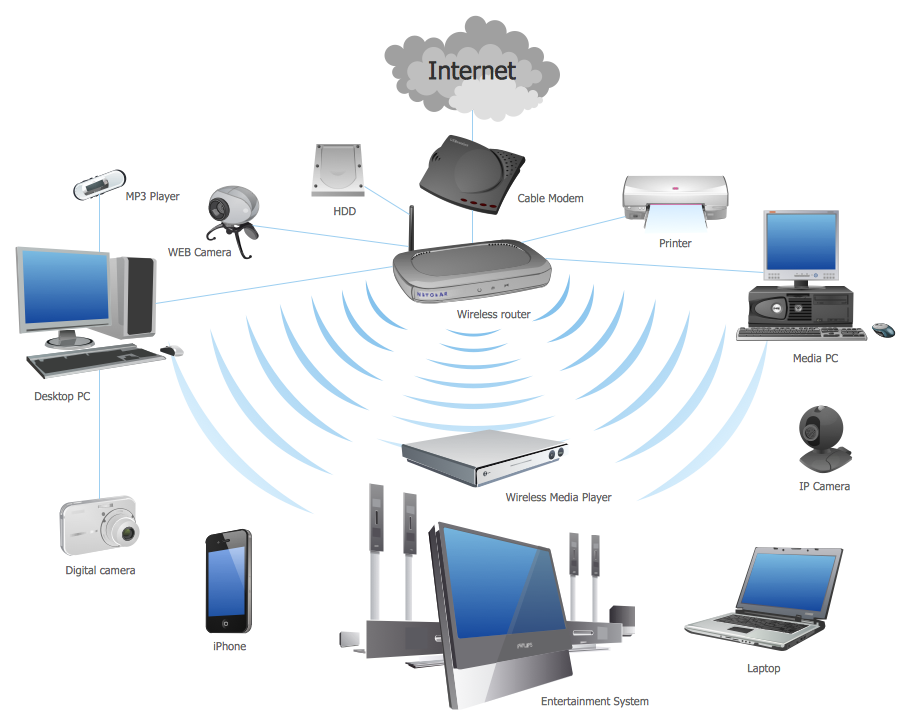
A Network-Attached Storage (NAS) device is a central storage unit that connects to your network, allowing you to store and share files across various devices. A wireless G network, on the other hand, uses the 2.4 GHz frequency band to provide internet access to devices connected to the network. To optimize your NAS with a wireless G network, you'll need to follow these steps:
Step 1: Configure Your Router
The first step in optimizing your NAS with a wireless G network is to configure your router. Check your router's manual to learn how to access the web-based interface. Typically, you can access the interface by typing your router's IP address in a web browser. Log in to the interface using the default administrator username and password.
- Ensure that the wireless G network is turned on.
- Configure the wireless network name (SSID) and password (WEP or WPA/WPA2 encryption).
- Set the wireless channel to use on the 2.4 GHz frequency band.
Step 2: Connect Your NAS to the Router
Once you've configured your router, connect your NAS device to the router using an Ethernet cable or a wireless connection. If you're using a wired connection, plug the Ethernet cable into the NAS device and the other end into the router. If you're using a wireless connection, go to the NAS device's control panel and configure the wireless settings to join the network.
Step 3: Configure the NAS Device
After connecting the NAS device to the router, configure the device to share files across your network. Access the NAS device's control panel and set up the following:
- Shared folders: Create shared folders on the NAS device to store and share files.
- User accounts: Create user accounts to access the shared folders.
- File permissions: Set file permissions to control who can access and modify files.
- Automatic backups: Set up automatic backups to ensure your files are always up-to-date.
Step 4: Access Your Shared Files
With your NAS device configured, you can now access your shared files from any device connected to the network. To access the files, follow these steps:
- Check if your device has wireless connectivity to the network.
- Open the file explorer (Windows) or finder (Mac) and look for the network location.
- Enter the IP address of the NAS device in the address bar.
- Log in with your user account credentials.
Conclusion
Setting up a wireless G network for your NAS device requires careful configuration of your router and NAS device. By following these steps, you'll be able to optimize your NAS for wireless sharing and data backup, ensuring seamless file sharing across all devices in your network.
Best Practices for Wireless G Network Security
To ensure the security of your wireless G network, follow these best practices:
- Use WPA2 encryption for wireless network security.
- Change the default administrator password.
- Set up a guest network to segregate visitors from your main network.
- Regularly update your router's firmware to ensure the latest security patches.
By following these steps and best practices, you'll be able to enjoy the benefits of a wireless G network for your NAS device while maintaining the security and integrity of your network.


")


 Drive")


 device - Bitcatcha")

 - Best Buy")


