Advanced G Network Settings for System Utility PC
In today's fast-paced digital landscape, maintaining optimal system performance is crucial for both personal and professional use. With the increasing reliance on network connectivity, understanding and configuring advanced network settings can be a vital task for system utility PC users. In this article, we will delve into the world of advanced network settings, exploring the intricacies of system utility PCs and providing actionable insights for users seeking to fine-tune their network configurations.
What are Advanced G Network Settings for System Utility PC?
Advanced G network settings refer to the sophisticated configurations and tweaks that can be made to customize and optimize system utility PC network performance. These settings often go beyond the basic configurations found in the Control Panel or Settings app, providing users with fine-grained control over network behavior.
Why is it Important to Configure Advanced Network Settings?
Configuring advanced network settings can have a significant impact on system utility PC performance. By optimizing network configurations, users can:
- Improve network speed and reliability
- Enhance online security and stability
- Customize network behavior for specific applications or tasks
- Troubleshoot connectivity issues and resolve problems
Accessing Advanced Network Settings in Windows 11
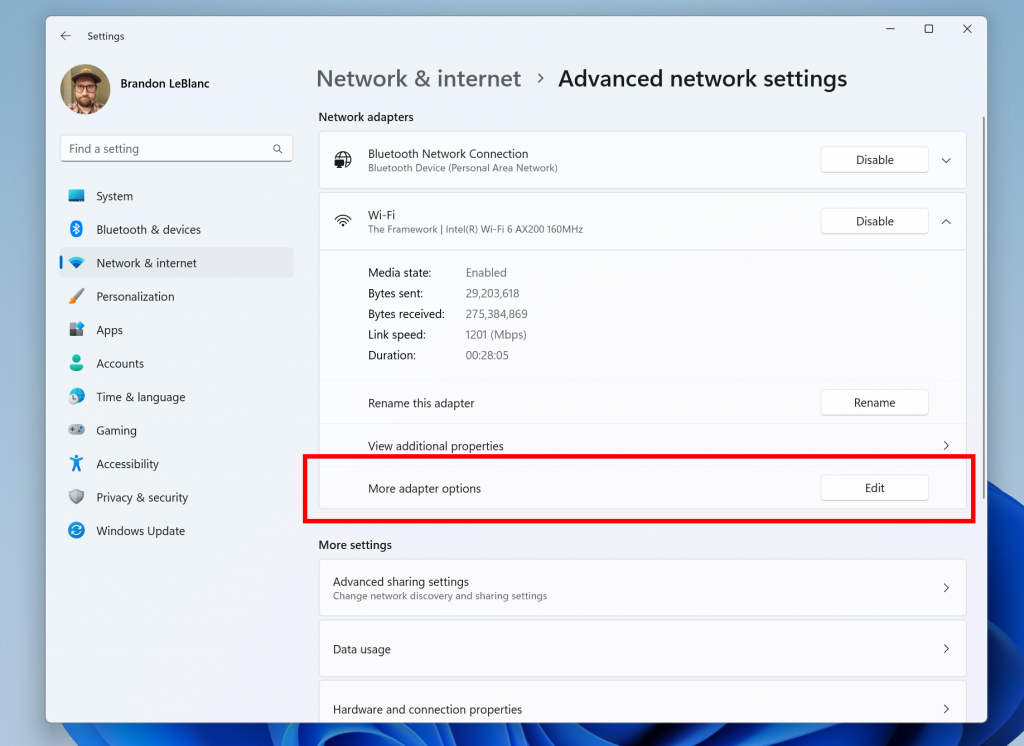
To access advanced network settings in Windows 11, follow these steps:
- Press Win+I to open the Windows Settings panel
- Navigate to the Network & Internet section and click on Advanced network settings
- From there, use the "More network adapter options" to open the legacy Network Connections window
- Right-click an adapter and select "Properties" to configure TCP/IP, DNS, and other settings
Resetting Network Settings in Windows 10 and 11
Resetting network settings can be a useful troubleshooting step for stubborn connectivity issues. In Windows 10 and 11, you can reset network settings using the Network Reset utility in the Settings menu:
- Press Win+I to open the Windows Settings panel
- Navigate to the Network & Internet section and click on Reset network settings
- Confirm the reset and check and reconfigure any VPN or proxy settings afterward
Understanding System Utility PC Network Performance
System utility PCs often come with built-in tools and utilities that can help monitor and optimize network performance. Some of the key tools and utilities to keep in mind when configuring advanced network settings include:
- Windows Performance Monitor
- Resource Monitor
- Task Manager
- Device Manager
Actionable Insights for Advanced Network Settings
Configuring advanced network settings requires a deep understanding of system utility PC internals and network behavior. Some actionable insights and tips for users seeking to fine-tune their network configurations include:
- Customize network settings for specific applications or tasks
- Improve network speed and reliability using Quality of Service (QoS) settings
- Enhance online security and stability using advanced security settings
- Monitor network performance using built-in tools and utilities
Conclusion
Advanced network settings for system utility PC are a crucial aspect of maintaining optimal system performance. By understanding and configuring these settings, users can improve network speed and reliability, enhance online security and stability, and customize network behavior for specific applications or tasks. In this article, we have explored the intricacies of system utility PC network performance, providing actionable insights and tips for users seeking to fine-tune their network configurations.


 - Scanning Documents and Photos")


