Wireless Router Setup for Wireless Internet: A Comprehensive Guide
Are you looking to set up a wireless router for your home or office internet connection? With the rise of wireless technology, setting up a wireless router has become easier than ever. In this article, we will provide you with a step-by-step guide on how to set up a wireless router for your wireless internet connection.Choosing the Right Wireless Router
Before setting up your wireless router, it's essential to choose the right one for your needs. There are various types of wireless routers available in the market, including:- Router with built-in modem
- Router without built-in modem
Setting Up the Wireless Router
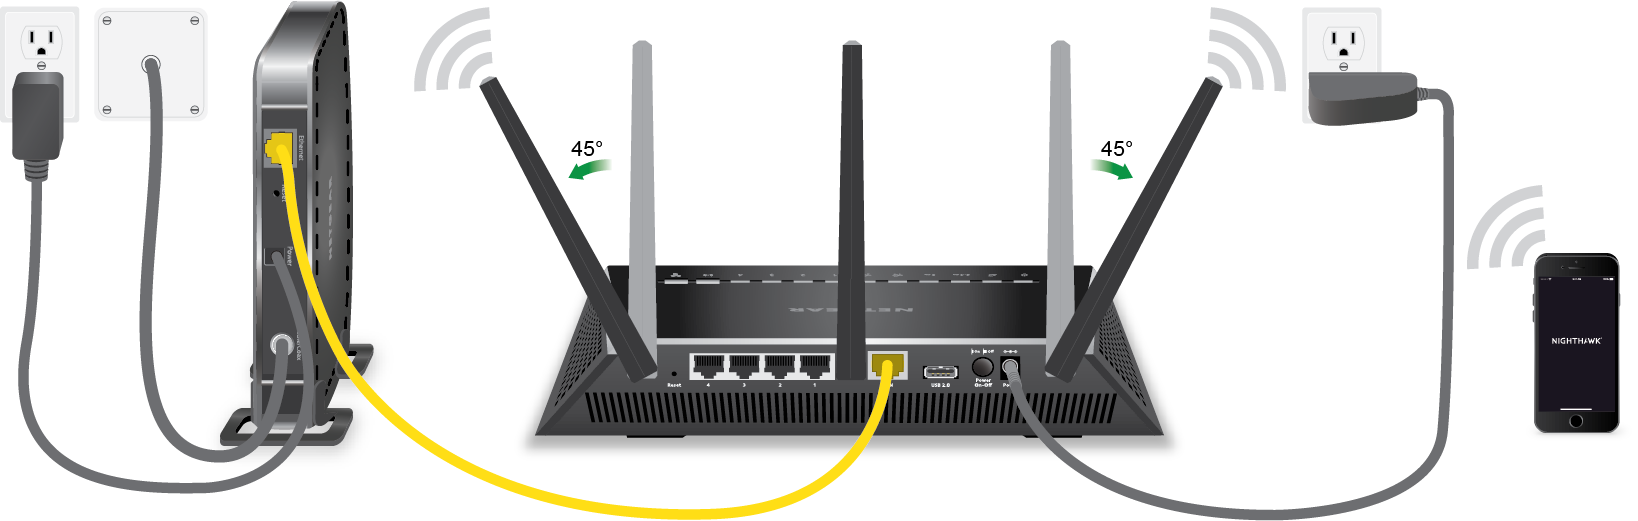
To set up your wireless router, follow these steps:Step 1: Physical Installation
Locate a central location in your home or office, away from any obstacles, and place your wireless router there. Connect the router to the modem using an Ethernet cable.
Step 2: Powering Up the Router
Plug in the router and turn it on. Wait for the router to boot up, and you will see the lights on the router start to flash.
Step 3: Accessing the Router's Web Interface
Open a web browser and type the router's IP address. The default IP address varies depending on the router, so check the router's documentation for the correct IP address. For example, for a TP-Link router, the default IP address is usually 192.168.0.1.
Step 4: Logging In to the Web Interface
Once you access the router's web interface, you will be prompted to log in. Use the default admin username and password to log in, which are usually found on the bottom or back of the router. Change the admin username and password for security purposes.
Step 5: Configuring the Wireless Network Settings
Configure the wireless network settings, including the SSID (network name), password, and channel width. Make sure to set a strong password to secure your wireless network.
Step 6: Saving the Settings and Restarting the Router
Save the wireless network settings and restart the router. Wait for the router to boot up again, and you will see the lights on the router stop flashing.
Step 7: Connecting Devices to the Wireless Network
Connect your devices, such as laptops and smartphones, to the wireless network using the SSID and password you configured in the previous step.
Tips for a Stress-Free Wireless Router Setup
To ensure a stress-free wireless router setup, follow these tips:Choose the Right Location
Place the wireless router in a central location, away from any obstacles, to ensure a strong and stable wireless signal.
Use Quality Cables
Use high-quality Ethernet cables to connect the router to the modem and devices.
Secure Your Wireless Network
Set a strong password to secure your wireless network from unauthorized access.
Regularly Update the Router's Firmware
Regularly update the router's firmware to ensure you have the latest security patches and features.


![[Wireless Router] How to use the QIS (Quick Internet Setup) to ... - ASUS](https://www.techcrates.com/wp-content/uploads/2014/09/wireless-router-setup-network.jpg "[Wireless Router] How to use the QIS (Quick Internet Setup) to ... - ASUS")

 Router Setup for Beginners")
 - HP")


![[Wireless Router] How do I enter my ASUS router's setting page using ...](https://static.tp-link.com/upload/faq/image-20230517092706-27_20230517162523z.png "[Wireless Router] How do I enter my ASUS router's setting page using ...")