Drywall Joint Compound Finishing: A Comprehensive Guide
Introduction
In the world of drywall finishing, joint compound is a crucial material that plays a vital role in creating seamless and professional-looking joints. Whether you're a seasoned professional or a DIY enthusiast, understanding the various types of joint compounds and their applications can make a significant difference in the outcome of your project. In this article, we'll delve into the world of drywall joint compound finishing, exploring its importance, types, and expert techniques for achieving a flawless finish.What is Joint Compound?
Also known as drywall mud, joint compound is a mixture of gypsum powder and water that turns into a smooth, paste-like substance. It's used to fill in gaps and cracks in walls, creating a seamless and professional finish.
Types of Joint Compounds
- General Purpose Joint Compound: A versatile compound suitable for most finishing applications, including taping, bedding, and finishing coats.
- Topping Compound: A lighter, faster-drying compound used for finishing coats, ideal for achieving a smooth, even surface.
- Setting Compound: A fast-setting compound used for emergency repairs, filling deep gaps, and flash taping.
- Specialty Compounds: A range of compounds designed for specific tasks, such as patching holes, repairing cracks, and matching textured ceilings.
Choosing the Right Joint Compound
When selecting a joint compound, consider the specific task at hand, the type of drywall you're working with, and the desired finish. For example, if you're working with textured ceilings or dealing with deep gaps, a specialty compound may be the best choice.
Applying Joint Compound
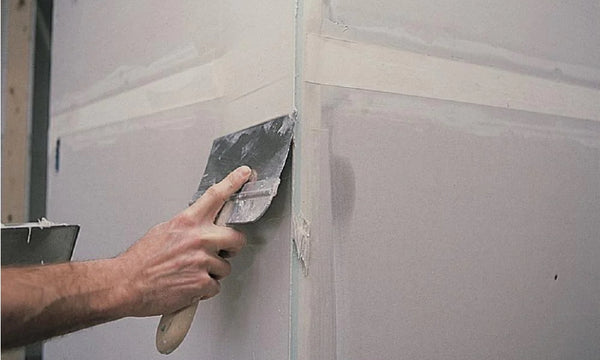
To achieve a smooth, even finish, apply joint compound using a putty knife or drywall knife, feathering the edges outwards to blend seamlessly with the surrounding drywall. Apply thin layers, allowing each coat to dry before sanding.
Step-by-Step Finishing Guide
- Step 1: Clean and Prepare the Area - Ensure the area is free of dust and debris, and inspect the joint for any imperfections.
- Step 2: Apply Joint Compound - Apply a thin layer of joint compound, using a putty knife or drywall knife, and feather the edges outwards.
- Step 3: Sand Aggressively - Use progressively finer grits to sand the joint, removing high spots and imperfections.
- Step 4: Apply Additional Coats - Repeat the process, applying thin layers of joint compound, allowing each coat to dry before sanding.
- Step 5: Final Sanding and Paint - Once the final coat is dry, sand the area to a smooth finish, and apply paint or finish as desired.
Top Tips and Tricks
- Use a taping knife for applying joint compound over tape on seams.
- Use a putty knife for scraping or filling small nail holes.
- Prime over joint compound for a smooth surface and better paint adhesion.
- Sand between coats to remove imperfections and ensure a smooth finish.
Conclusion
With the right joint compound and a little practice, you can achieve a flawless, professional-looking finish on your drywall projects. By understanding the different types of joint compounds and expert techniques, you'll save time and produce high-quality results that will make your projects stand out.


